You know it’s bad when the transfer stops at 47%, and you can’t tell if it’s stuck or failed. That happens all the time when you’re trying to send work docs or download vacation photos, and the app just freezes mid-upload. When your file transfer fails or stops, the cause is usually something simple, like a weak signal, a bad cable, or storage that’s full.
Across USB, WiFi (like Phone Link or Nearby Share), Bluetooth, and cloud services like Google Drive or Dropbox, the pattern is similar. Bad connections and outdated drivers break USB reads. Weak WiFi or closed apps cause timeouts. With Bluetooth, large files can fail on busy signals. In the cloud, sync stops when storage runs out, the device clock is off, or file properties clash during copy.
In the next sections, you’ll get fast, no-tech-skills-needed fixes for each method, based on the common 2026 issues people hit daily. First up, we’ll troubleshoot USB transfers, starting with the cable and phone settings that cause most mid-transfer stops.
Run These Basic Checks First to Restart Any Stuck Transfer
When a transfer stalls, your first job is to clear out the “busy” state. Think of it like knocking on a neighbor’s door before you move the furniture. Often, a simple restart fixes the setup, pairing, and temporary glitches that cause 47% hangs and long “99%” progress bars.
Before you switch USB ports or dive into settings, run these basic checks in order. They solve about 40% of stuck transfer issues because they reset the key parts that usually break: power, connection, and destination space.
- Confirm both devices are awake and connected
- Make sure the sender and receiver are on, unlocked, and not sleeping.
- Re-seat the cable, or disconnect and reconnect the Bluetooth or Wi‑Fi link.
- Check batteries (don’t skip this)
- Keep both devices above 20% battery, ideally over 50%.
- Low battery can slow transfers or make Bluetooth drop mid-file.
- Restart the sender and receiver
- Power off both devices, wait 30 seconds, then turn them back on.
- This clears stuck services that keep “waiting for connection” messages alive.
- Verify destination storage
- Confirm you have enough free space for the full file size.
- Also check that the destination drive is not read-only or write-protected.
- Reset temporary connection glitches
- Unplug USB, then plug it back in.
- Toggle Wi‑Fi or Bluetooth off and on, then try again.
- If you’re transferring over the internet, test your speed
- Run a quick test on CNET’s speed tests to spot bad upload speed.
- Slow or unstable upload often looks like a “stuck” transfer.

Here’s a real-world example: you plug a phone into a laptop, and the copy freezes at the same progress point every time. After a restart and a battery check, the transfer runs through. The fix is boring, but it works because the first connection handshake gets reset.
Another common example happens with Bluetooth. The devices pair, then file sending never truly starts. After you fully reboot both devices, the “can’t complete” message often disappears, and the transfer begins normally.
Do these steps first. Then you can switch to method-specific fixes for USB, Wi‑Fi, Bluetooth, or cloud uploads without wasting time.
Fix USB Transfers That Fail or Freeze Midway
When a USB transfer fails or freezes midway, treat it like a broken link in a chain. One weak link, like a worn cable or a flaky port, can stop the whole job. Start with software fixes first, then move to hardware isolation.
Your goal is simple: get a stable connection long enough to finish the copy.
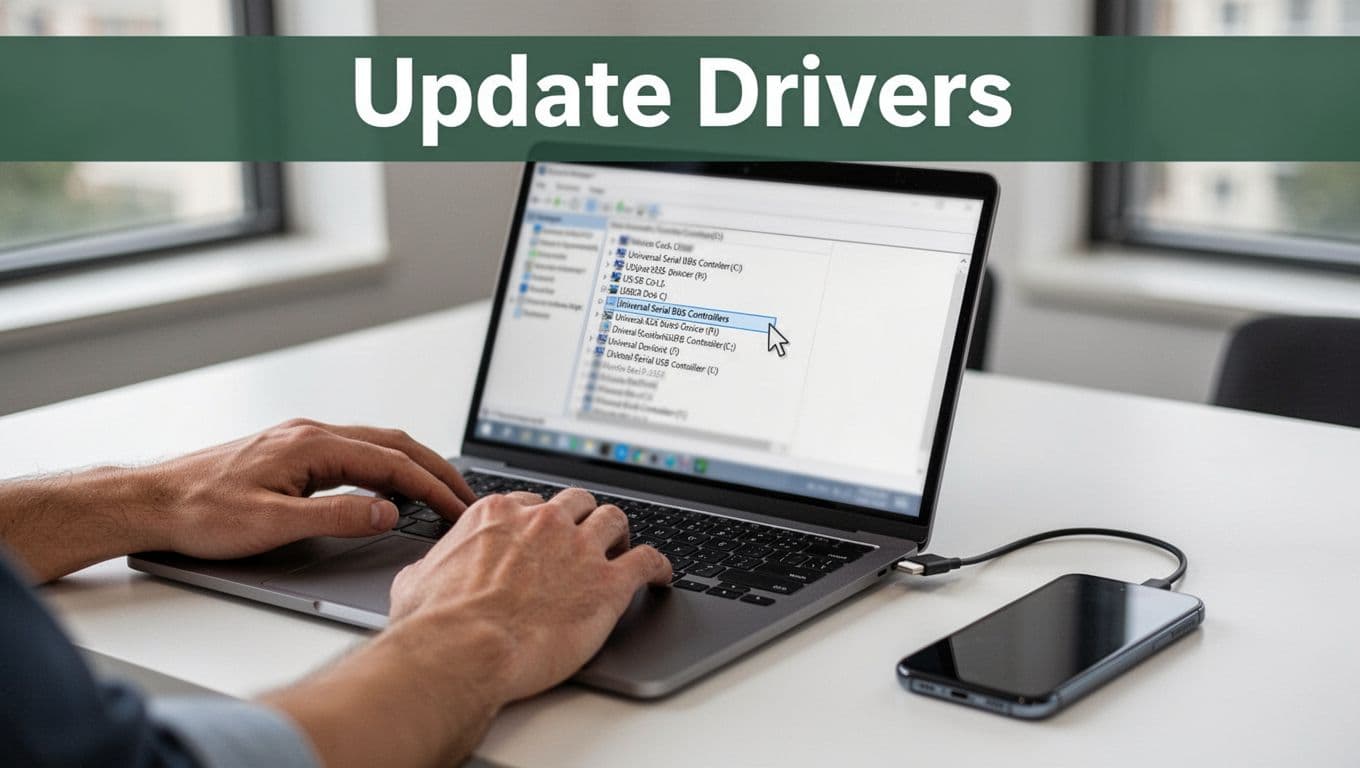
Update Drivers and Restart for Reliable USB Speeds
Outdated or corrupted USB drivers can cause transfer speed drops, random disconnects, and “stuck” progress bars in Windows 11 and Windows 12. Over time, Windows keeps trying to reuse the same driver path, even after an update, which can lead to the same failure point again and again.
Start with the driver update path you can do right now:
- Right-click Start.
- Select Device Manager.
- Expand Universal Serial Bus controllers.
- Right-click your USB device (or entries that look like USB Root Hub / USB Host Controller).
- Choose Update driver.
- Pick Search automatically and let it finish.
- Restart the PC.
If updating doesn’t help, do a clean uninstall/reinstall. This forces Windows to rebuild the USB driver stack for that device.
- In Device Manager, right-click the USB device.
- Choose Uninstall device.
- Disconnect the USB cable.
- Restart your PC.
- Reconnect the drive or phone using a known good cable.
If Windows shows a “worked yesterday” port that now acts up, driver corruption is a common reason. It’s also why you should avoid skipping the restart step. Think of it like turning a faucet off, not just twisting the handle slightly. The system needs to reset how it talks to the USB hardware.
For extra reliability, also check power settings that can shut off USB to save battery during big copies. In Power Options, find your advanced plan settings and disable USB selective suspend. On device properties, look for Allow the computer to turn off this device and turn that off. Those settings often explain why transfers freeze right after the file starts moving.
Mac note, keep it simple: update macOS in System Settings > Software Update. If ports act weird after updates, reboot (and if needed, do an SMC reset on Intel Macs). The key idea stays the same: let the system refresh its USB support.
For large files, driver fixes help, but they don’t remove every risk. So after updating, try again with the same file first. Then try a second file only if the first one finishes.
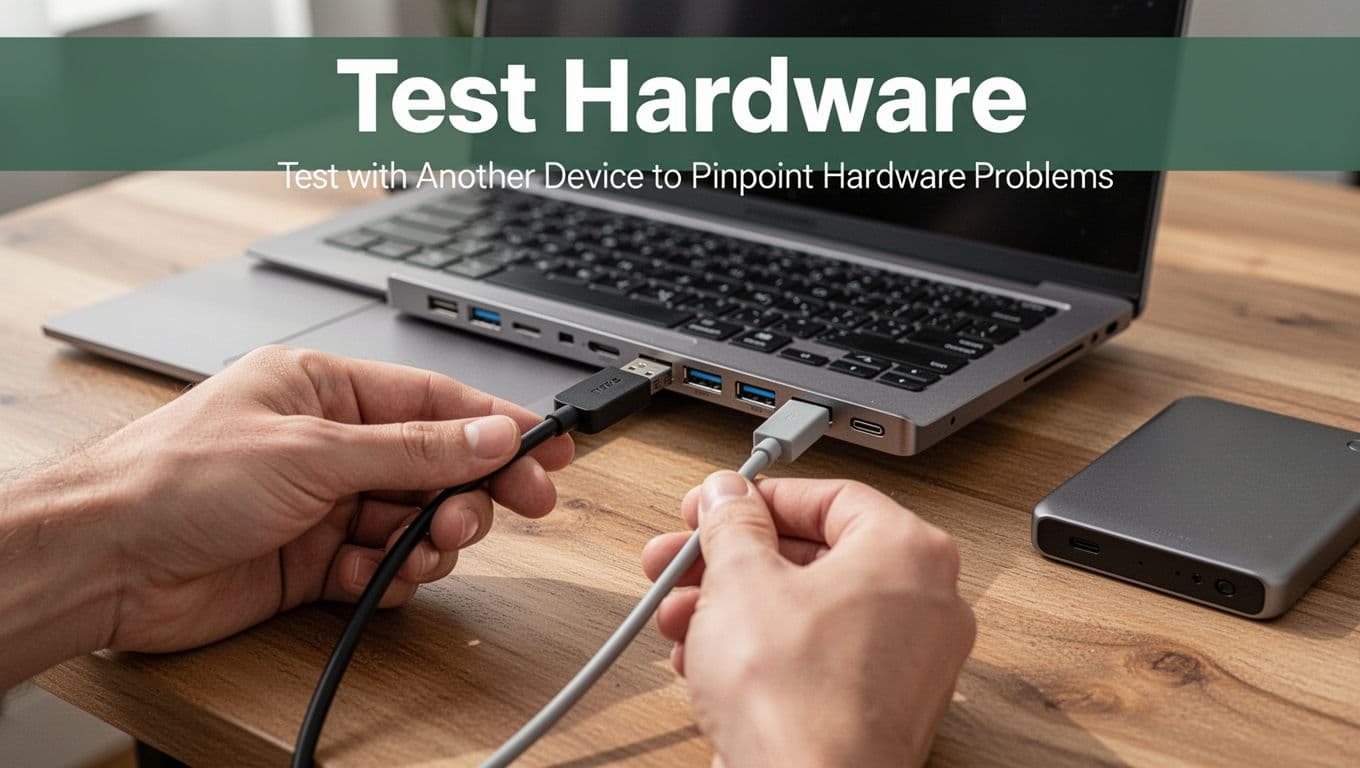
Test with Another Device to Pinpoint Hardware Problems
When USB transfers fail mid-way, hardware issues hide behind “it’s probably the software.” Ports can loosen, cables can wear out, and some cables act like they were built for charging only. Dust also loves USB-C and can make contact unreliable.
You can isolate the real culprit fast by testing with another device. You’re basically running a side-by-side comparison: does the problem move, or does it stay?
Follow this isolation order:
- Swap the cable first. Use a known-good data cable, not one you found in a drawer.
- Try a different USB port. If your device has both USB-A and USB-C, test each.
- Try another computer. Plug the same drive into a different PC or Mac.
- Try another drive or phone. Plug a different device into your original PC port.
If the transfer works on a different computer, your port or drivers on the first PC are likely the issue. If it fails with multiple computers but works with another cable, the cable (or adapter) is the problem. If every setup fails, the drive or phone storage may be failing, especially when the freeze happens at the same percentage every time.
One key detail: charge-only cables can trick you. Your phone may light up, but data transfer stalls or never starts. You can often tell by trying the cable with a different device, or by using a cable you know supports file transfers. When in doubt, use the cable that originally came with the device.
Also inspect the physical connections. Check for bent connector pins, loose fit, and grime. A quick clean helps. Use compressed air to blow out dust from the port. Don’t shove tools inside. Instead, give the port a few careful puffs, then test again.
Heat matters too. Large transfers generate heat, and a warm drive can throttle or drop. If you feel the device gets hot, pause and let it cool, then restart the copy.
When you test, treat it like a lab experiment, not a guessing game. Change only one thing each run (cable, then port, then computer). That way, you’ll know whether the failure follows your hardware.
Finally, safety matters. When the copy does finish, use Eject/Unmount before unplugging. Skipping that step can cause corruption, making your next transfer fail even sooner. For big files, consider copying in smaller batches so a single bad chunk doesn’t ruin the whole session.
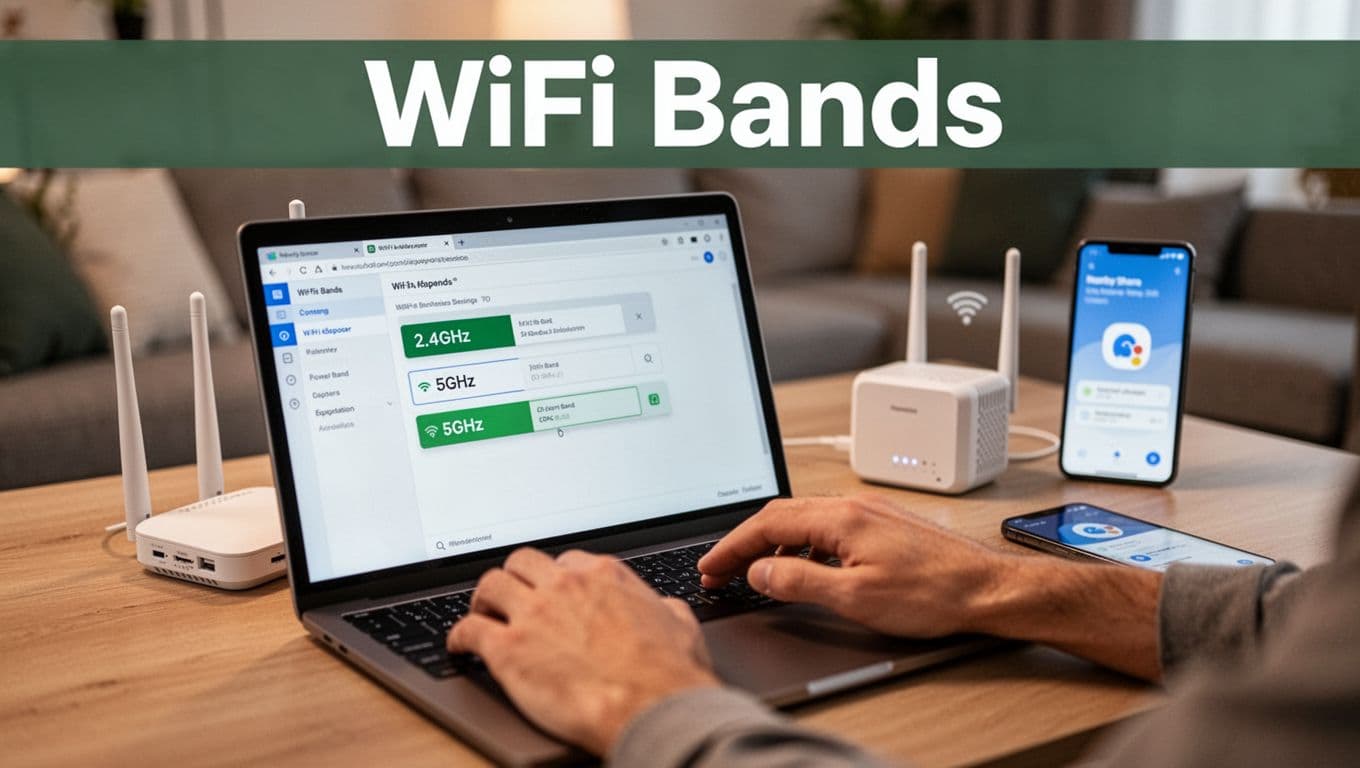
Switch Bands and Update Adapters for Faster Connections
When your WiFi file transfer drops, the signal often acts like a shaky walkie-talkie. You might still hear enough to connect, but the transfer stalls when the data has to move continuously. Switching bands and refreshing your network adapters usually fixes it fast, especially for Nearby Share, shared folders, and apps that move large files.
Switch between 2.4GHz and 5GHz (and pick the right one)
2.4GHz travels farther and goes through walls better. However, it tends to get crowded. In busy homes, it can feel like trying to talk in a loud room. That congestion is one big reason transfers fail or freeze mid-upload.
5GHz usually performs better for file transfers. It can carry more data at once, so big photos, videos, and work documents move quicker. The tradeoff is range. Walls and floors weaken it more, so you want your devices closer to the router, or with a clearer line to the access point.
In practice, try this simple rule:
- If you’re within about 30 feet of the router (and fewer walls), prefer 5GHz
- If you’re farther away or through multiple walls, 2.4GHz may hold a connection longer
To change bands, start in your router settings. Many routers let you enable separate SSIDs (for example, HomeWiFi-2G and HomeWiFi-5G). Then connect your phone and laptop to the 5GHz network.
On Windows, if you want a quick, reliable path, follow instructions like switch the WiFi band in Windows and reconnect to the 5GHz SSID.
Update your WiFi adapter drivers (and restart the stack)
Even if the band is correct, an old or buggy driver can cause drops under load. Windows can also power-save or mis-handle the WiFi adapter during long transfers.
Do this in order:
- Open Device Manager.
- Find your Wi-Fi adapter under Network adapters.
- Choose Update driver.
- Restart the PC, then test the transfer again.
If you want the official, step-by-step approach, use Microsoft’s guidance for updating through Device Manager: update drivers through Device Manager.
After you update, test at the same spot you’re normally stuck. If the transfer improves right away on 5GHz, the issue was likely either wrong band, interference, or an adapter that did not handle steady throughput well.
Get Bluetooth Transfers Moving Again Without Re-Pairing Hassles
When Bluetooth file sending stalls, you usually do not need to “start over” with a full re-pair. Fix the settings that block transfer first, then only remove and re-add the device if Windows still refuses to move data.
Think of it like trying to mail a package with the wrong postage. The address can be correct, but the policy blocks the delivery.
Match Encryption Settings to Stop ‘Policy Disabled’ Errors
If you see a message like “file transfer is disabled by policy”, encryption settings are often the culprit. Windows can block transfers when devices and sharing settings do not line up, even if pairing still looks normal. This is especially common on work PCs with stricter rules, or after updates.
Use these steps, then restart. After the restart, try sending the file again right away.
- Open Settings.
- Go to Network & Internet.
- Select Advanced sharing.
- Find File sharing connections.
- Turn on Enable 40- or 56-bit encryption.
- Restart the PC.
That’s the key switch. Once you enable that encryption level, Windows allows the older Bluetooth file transfer method your device may still be using.
If the error persists, check whether your PC is managed by an IT team. On work devices, group policy may lock these options. In that case, you can still try the steps below, but you may need admin help for encryption policy changes. You can also review community cases that match this “disabled by policy” behavior on Windows Bluetooth file transfer disabled by policy on Windows 10 (Super User).
Before you test again, make sure:
- Both devices have enough battery (charge them if you can).
- You stay within 30 feet and avoid walls or metal obstacles.
- The receiving PC is actually in ready-to-receive mode.
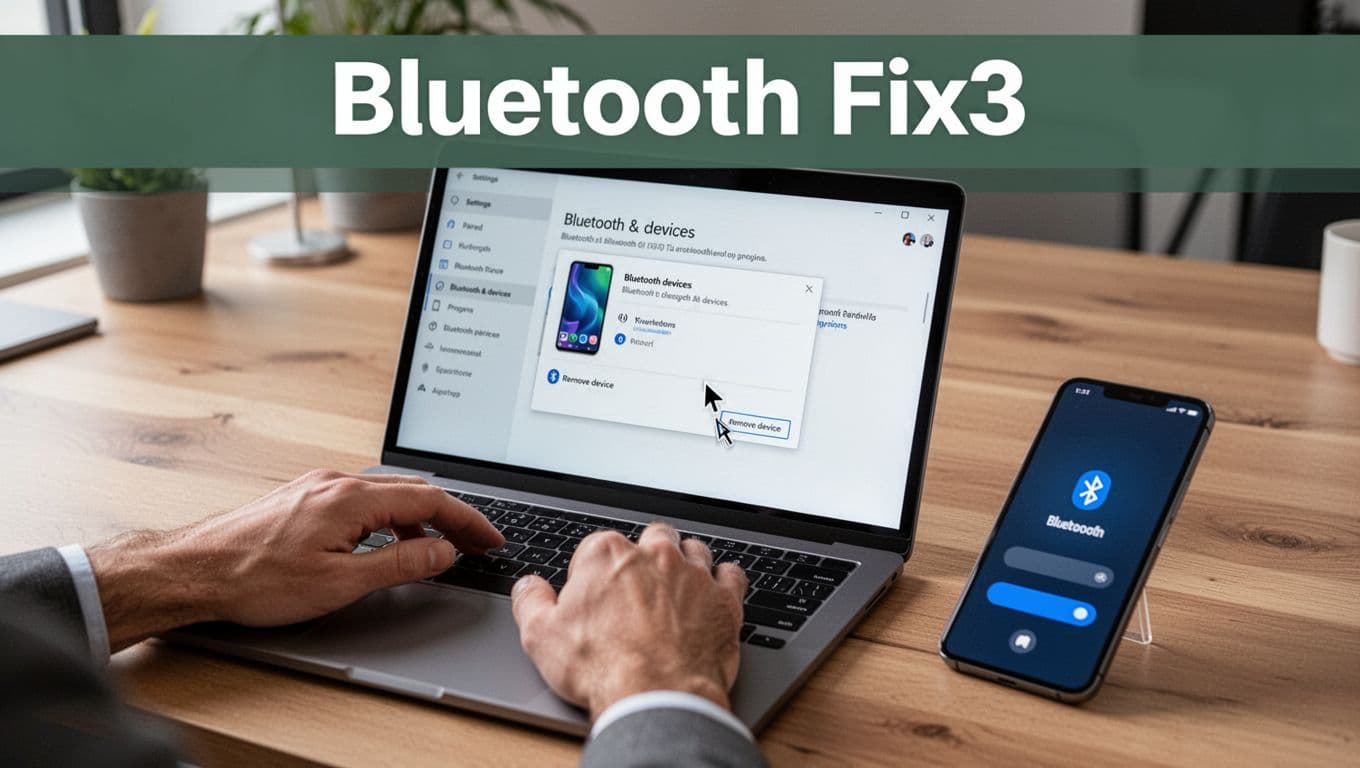
Re-Pair Devices and Run the Built-In Troubleshooter
If encryption is not the issue, you can usually fix Bluetooth transfers by refreshing the device link. You want Windows to rebuild the connection cleanly, without keeping a “stuck” pairing state.
Start with a quick repair cycle and then run the troubleshooter. Both actions reset different layers, so together they fix more failures than either one alone.
- Open Settings.
- Go to Devices.
- Select Bluetooth.
- Find the device you’re sending to.
- Choose Remove.
- Turn Bluetooth off, then back on.
- Put the other device into pairing mode (or make it visible).
- Choose Add new and re-pair.
Now run the troubleshooter. In Windows, the path may vary slightly by version, but it generally lives under Settings troubleshooter tools. Follow this approach:
- Open Settings.
- Go to Update & Security (or System on newer builds).
- Open Troubleshoot.
- Find Other troubleshooters.
- Select Bluetooth.
- Click Run.
After it finishes, restart the PC, then try sending a small file first (under 100MB). Large Bluetooth transfers can fail even when pairing works, so test with something smaller to confirm the fix.
If the device fails to show up during pairing, make it discoverable/visible for a couple minutes. For a clean pairing walkthrough, use Microsoft’s guide for pair a Bluetooth device in Windows.
Unblock Cloud Uploads by Clearing Cache and Checking Service Status
When cloud uploads stall, your browser can be the silent culprit. It may keep old login tokens, cached upload pages, or broken site data, so the upload request never finishes. At the same time, the cloud service might be having a temporary hiccup, so you want to confirm both.
Start here: clear the site data for the cloud app you’re using, then check the official status page. If the service is down, no amount of cache clearing will fix it. If the service is up, you can usually get uploads moving again quickly.
Clear Cache for Your Browser, Then Confirm Service Status
First, clear the browser’s cache and cookies for the specific site (not your whole browser, if you can). Then reload the upload page and try again.
Use these quick steps for the most common browsers:
- Chrome (Windows/Mac)
- Open Settings.
- Go to Privacy and security, then Third-party cookies or Cookies and other site data.
- Click See all site data and permissions.
- Search for
drive.google.com,onedrive.live.com, ordropbox.com, then remove the site data. - Reopen the upload tab and sign in again.
- Edge (Windows/Mac)
- Open Settings.
- Go to Privacy, search, and services.
- Under Clear browsing data, choose Choose what to clear.
- Select Cookies and other site data and Cached images and files.
- Reload the page and retry the upload.
- Firefox (Windows/Mac)
- Open Settings.
- Go to Privacy & Security.
- In Cookies and Site Data, choose Clear Data (then retry after signing in).
If you want browser-by-browser details, use Atlassian’s steps to clear browser cache.
Next, check official status pages for the service you’re uploading to:
- Google Drive (Google Workspace Status Dashboard): Google Workspace Status Dashboard
- OneDrive / Microsoft 365: Microsoft 365 Service Health
- Dropbox: Dropbox Status Page
If the status page shows an outage or degraded performance, your best move is to retry later and use a local copy method meanwhile.
If nothing is down, clear cache again for the exact site, sign in once more, and retry with a smaller file first. That simple test often confirms whether you fixed the cache problem.
Lock Down Future Transfers So They Never Fail Again
Once you get a transfer working again, don’t treat it like a one-time win. Lock in the conditions that make files move reliably. Think of it like tuning a bike before a long ride, so you don’t keep stopping on every hill.
Future failures usually come from the same handful of weak points: cables, drivers and firmware, wireless range, file size and compression, and destination storage. Fix those, and your USB, Wi-Fi, Bluetooth, and cloud uploads get steadier fast.
Build a “no surprises” transfer setup (the stuff that matters most)
Start with a simple rule: use the right method for the job. USB wins for big files. Wi-Fi helps for nearby sending. Bluetooth works, but it’s best for smaller items.
Then, set up your gear so the link stays strong from start to finish.
Use this prevention checklist each time you transfer large files:
- Use a quality data cable (not a charge-only cable). If you do not know, test it with a second device first.
- Buy cables that explicitly support data transfer, not just charging. Reviews can help you spot real data cables. For USB-C picks, see tested USB-C cable guidance from PCWorld.
- Update drivers and firmware on phones, PCs, routers, and adapters. Wireless issues often show up only under load.
- Stay in range for wireless transfers. For Bluetooth, keep devices close (about 30 feet). For Wi-Fi, keep signal strong by moving closer or reducing walls.
- Compress large files before sending. For example, zip folders when the destination supports it.
- Monitor destination storage and quota. Full drives and cloud caps cause “it stalled” moments.
- Use auto-backups for the files that matter. When something fails, you should not lose work.
Also, restart on a schedule you can handle. A weekly reboot clears stuck services. It feels old-school, but it prevents the “same percent every time” trap.
The most reliable transfers feel boring. Stable power, stable connection, and enough free space.
Choose tools that recover when connections drop
Even with good prep, connections can still dip. The key difference is whether your tool can resume after a hiccup instead of restarting from zero.
In 2026, I look for apps that do these things:
- Auto-resume after a disconnect
- Encryption for privacy during sending
- Clear progress so you can tell what’s happening
- Smaller retries for large uploads
For Wi-Fi and nearby sending, DeskIn gets strong results because it focuses on local transfer speed and adds resume-style behavior. You can see a 2026 overview in DeskIn file transfer software for Android. When you only need one phone-to-phone transfer, browse other Wi-Fi options too, but keep the resume feature in your filter. For example, this roundup can help you compare choices like that: best Android Wi-Fi file transfer apps.
When you need “anywhere access,” cloud links help because you can re-download safely. However, cloud upload failures still happen when cache or auth tokens get stale. So after you fix things once, keep using a repeatable routine: retry with a smaller file first, then move to larger batches.
Keep the destination ready, every single time
Most “failed transfers” aren’t really about the transfer. They’re about what happens at the destination.
So, before you start, do a quick capacity check on both sides:
- Confirm free space on the receiver (and on any external drive).
- If you’re using cloud, verify your quota.
- Make sure the destination folder allows write access.
- If possible, copy to a local folder first, then move.
Also, plan your file size. If you regularly send huge videos or large work folders, split them into chunks. For example, send one zip per project, not one massive archive. If one part fails, you fix one part. You do not redo everything.
Finally, when a transfer finishes, use proper eject or unmount steps for USB storage. If you unplug too fast, you can corrupt the destination, and the next transfer fails sooner than you expect.
Conclusion
When a file transfer fails or stops, your fastest wins usually come from the basics. First, restart both devices and confirm destination storage so you’re not fighting a bad connection or a full drive. Then, keep it simple by testing one change at a time (fresh cable or port for USB, closer distance and correct band for Wi-Fi, and Bluetooth settings or the built-in troubleshooter for Windows).
After that, move by method: update drivers when hardware should be stable, clear browser or app cache for cloud uploads, and check service status if uploads still stall. For most people, those steps fix the issue in under five minutes, because they reset the same failure points that cause the “stuck at the same percent” problem.
Try the steps now with your next transfer. What worked for you (USB cable swap, 5GHz Wi-Fi, Bluetooth troubleshooter, or clearing cloud cache)?
If you want a backup plan when your current method keeps failing, check the related guide: Best File Transfer Apps 2026. Smooth transfers are close, once the connection and destination line up.